Wednesday, June 20, 2007

Banana Bread With Chocolate Chips & Cinnamon Sugar

Here is another recipe which I immediately baked when I got home from work after reading another favorite blogger wax poetics about it. Reading her blog almost seems like reading poetry, I love it! Sometimes when Im at work and I'd get a chance to have a sneak peek at some food blogs, I get a strong craving to go home and immediately try the recipes! This is one of those moments, and I literally hopped my way home to start baking!

As Molly said, this recipe is super easy - you can expect no messy clean-ups later as it just requires one bowl. I love the combo of banana and cinnamon and chocolate chips! Can you think of any heavenly combo than this one? Hmm, the aroma wafting in the kitchen was just super :)
It also helped that she's giving all these tips for storing it, I made a big batch and they're still in the freezer at the moment, ready for my next banana craving attack. Please head on over to her recipe, you'd be sure glad to stumble upon it. I can see myself baking this often, I just love these recipes that don't require much effort and much clean-ups afterwards. Much that I love to bake, it sometimes takes a toll on poor moms like me who juggle work and family life! So thanks for recipes like this, you never compromise your family on store-bought goodies. This will be great for the Little Bee's school snack pack :)

Wednesday, June 13, 2007

Homemade Pesto, Inspired By A Fellow Blogger

The title says it all, when I saw that one of my favorite bloggers got inspired by her boss to make homemade pesto, I just had to try it too! Stella's blog is such a delight to read, her words so fresh and you could see through her amiable personality right through her blog! And if that wasnt enough, she lives in beach paradise Mauritius!

Please head on over to her mouthwatering pesto recipe, which I dutifully followed (except I had to substitute pine nuts for walnuts). The walnuts are actually a very good substitute, in this land where pine nuts are hard to come by. The pesto is so refreshing, so easy to make and it keeps well too. Ive had my jar for over a week now, and whenever we get a craving for pasta, all we have to do is cook our pasta al dente, take the jar from the ref and toss the pesto with the pasta! And then you can let your imagination go wild at this point - you could add sundried tomatoes as Stella did, or sardines, or anchovies, even capers if you like! But i wanted mine plain and refreshing, and so just tossed it and added a bit more olive oil. Nothing could be more refreshing than the sweet sweet aroma of fresh basil!


Thank you for the recipe Stella! Will definitely make it again and again! I hope that you continue to go blogging on and on and on... as a constant reader, I continue to be inspired to cook and bake!:)

Tuesday, June 05, 2007

A Happy Third Bday

I cant believe my dear nephew is 3 years old! He successfully passed the terrible two stage - without being terrible! Seriously he's the most mild-mannered kid I've ever encountered. Because he's so blessed with very generous godparents, and even more generous grandparents, I've decided to skip the whole toy gifts and bake him his birthday cake instead! Im sure he cant appreciate it now, but when he's bigger - he's gonna thank me heaps for this kind gesture *winks**.

He had a party which unfortunately we were unable to attend as the Little Bee was sick, but nevertheless I sent his cake and I sure hope he enjoyed it, as well as the magic candles that wouldnt be off unless you dip it in water! Haha, tricky!

This is my very first attempt at baking a proper birthday cake. I wanted a two layer cake with immaculate white frosting and sprinkles all around - the ideal birthday cake. Alas - there were a lot of mishaps! I used the same Amazon cake recipe I always do with success, and the Vanilla Buttercream frosting Ive used before for the Little Bee's birthday cupcakes. While it was a success back then, it was a disaster this time around - not the recipes - they were still as great. But Ive learned some valuable lessons about them that I surely will remember for a long time.

First, the first cake layer crumbled over the weight of too much frosting! That was lesson number 1: this cake is maybe not the best one if you plan to layer it. After I've dapped too many frosting, the top layer just cracked! Thats why I ended up with just a single layer cake, *sigh*.

Second, while I adore the frosting recipe - there were two problems I encountered. First, it wouldnt turn the immaculate white that I wanted because there were just too many butter in the recipe that even if I added the maximum allowed powdered sugar, it still remained yellowish. I had to tint the frosting a bit of green to mask the butter-like color. Lesson learned: try another frosting recipe with a lot of egg whites ( Im guessing that would create the good white color I wanted).

Secondly, it was too soft for a two-layer frosting and actually was dipping to the side of the cake! In a hot summer temperature like ours, it was practically melting!

Nevertheless, I enjoyed making the cake and appreciate the lessons that came with it. It still tasted good, and the cute sprinkles hid whatever deformities the melting frosting did. Happy birthday to my sweet sweet nephew V!

Tuesday, May 29, 2007

Lemon Squares


I know, I know, I have abandoned this blog for so very long. Sigh, so much things to do and so little time. Not to say though that I have completely been out of the kitchen, Ive been doing some random knick-knacks once in a while, when time permits..

On one particular Saturday when everyone was home, particularly Em who had a bad case of chicken pox and thus couldn't go out for two weeks (what have you - he finished all seasons of Prison Break, Lost and 24!), I had to immediately work on the remaining lemons in the ref. What to do but this oh-so-very-simple-but-so-packed-with-yum lemon squares! This is Em's favorite, I think more so that this was his late aunt's last request from him before she passed away 3 years ago.

This for me is the best lemon square recipe (though I forgot what my source was). The crust is not cloying with just the right crumbiness, the lemon and zest quantity is just right. Its a delight all around, and I really cannot be compelled to tinker with the recipe, or worse to try other ones! Next time you have lemons galore, do save some for this!

Lemon Squares

Crust:
1/2 cup (1 stock) unsalted butter, room temp.
1/4 cup confectioner's sugar
1 cup all purpose flour
1/8 tsp salt

Filling:
1 cup granulated white sugar
2 large eggs
1/3 cup fresh lemon juice (from 2 lemons)
1 tbsp grated lemon zest (from 2 lemons)
2 tbsp all-purpose flour

Preheat oven to 350 degrees F and place rack in the center of the oven. Grease with butter an 8x8 inch square pan.

FOR CRUST: In the bowl of an electric mixer, cream the butter and sugar until light and fluffy. Add the flour and salt and beat until the dough just comes together. Press into the bottom of your greased pan and bake for about 20 minutes, or until lightly browned. Remove from the oveb and place on a wire rack to cool while you make the filling.

FOR FILLING: In your electric mixer, or with a hand mixer, beat the sugar and eggs until nice ans smooth. Add the lemon juice and zest and stir to combine. Fold in the flour. pour the filling over the shortbread crust and bake for about 20 minutes, or until the filling is set. Remove from oven and place on a wire rack to cool.

Cut into squares and dust with powdered sugar. Best eaten on the same day but can be stored up to two days covered in the ref (but will it really last that long?).

Thursday, April 12, 2007

Mango Preserves

What to give my brother who so generously sent me my much-coveted Valrhona and Ghirardelli chocolates? He only has one request, pickled mangoes! My brother lives in the US, and so miss the flavors of this tropical country especially some old family recipes and hometown speciaties.

He is my source of anything that can be had expensively here in Manila such as my MAC lipsticks, Baby Gaps for the little Bee, and of course - chocolates for my baking! Last month, he sent us a generous package that Im still drooling about now *winks*. And in return he just wants preserved mangoes from our late Aunt's recipe. So what's a spoiled brat to do but spoil big brother in return?

His request is aptly timed as it's summer and mangoes are going out of our ears here in the Philippines at the moment. For this particular one, I wanted to be picky - so I scoured the markets for the big Guimaras mangoes - a very good variety. These are the big fat green mangoes, slightly yellow in the inside yet still has that crunch and tartness. I made a big batch, and off these will go straight into my bro's refrigerator in Long Beach, California for him to enjoy in the next few weeks!

Preserved Mangoes
In memory of Mamay

10 Guimaras green mangoes, peeled and cut into thick strips
1/2 cup rock salt

4 cups water
2 cups white sugar

Drizzle salt over cut mangoes and let stand covered in the refrigerator overnight. The next day, drain mangoes. Prepare the syrup by simmering sugar in water until slightly boiling and sugar is fully dissolved. Arrange drained mangoes in sterilized jars and pour the sugar syrup (you dont need to cool the liquid). Cover immediately and store in the refrigerator indefinitely. Ours dont last long though. This makes about 10 small jars.

I sure hope my bro enjoys this as much as we are enjoying it here. Manila weather has gone haywire, the other day it was so hot we felt like escaping from the house. So we put out the Little Bee's bicycle outside, I set up a table in the front yard - and took out my pickled mangoes and enjoyed it while Em occasionally passes by our front as he did his jogging. Such a small pleasure on a hot summer afternoon :-)

Monday, March 19, 2007

The Apple Pie That Won The Judges Over

My sister is an avid magazine collector having started with fashion magazines and after she got married, have been obsessed with interior-design magazines. My love for mags like House Beautiful and Better Homes and Gardens actually stemmed from her and before I knew it, I had my own little collection that I keep reading and salivating back to whenever I get the itch to redesign the rooms in the house or just looking for inspiration and dreaming of my ultimate dream house! Im very partial to country designs, and loved the show Shabby Chic in the Lifestyle Network, which unfortunately does not show anymore.

But as I realized later on, I was looking less and less at the home designs and more on the recipe section usually found at the latter part of most home magazines. My favorite is Country Living, where not only do I like the home designs but the country, rustic recipes that almost always accompany it. This particular issue featured the Iowa State Fair, an annual event which gives out blue ribbons to winners of the best of the best of country cooking!

I was ever so curious to try out this recipe, which won the Best All-American Pie category and awarded the blue ribbon prize to a certain Christine Moltavo. Thanks Christine for this wonderful recipe! The apple pie crust was real flaky and the apples not mushy at all but chunky with just the right hint of cinnamon and nutmeg. Although I haven't tried that many a recipe of Apple Pie, I can clearly see this a winner!

All-American Apple Pie
Adapted from Country Living, August 2005

3 3/4 cup all-purpose flour
1 tsp salt
1 1/4 cups cold unsalted butter (2 1/2 sticks), cut in cubes
6 tbsp coldvegetable shortening
3 cups Golden Delicious apples, cored, peeled and sliced
3 cups Granny Smith apples, cored, peeled and sliced
1 tbsp lemon juice
1/4 cup light brown sugar
1/4 cup granulated sugar
1 1/2 tsp ground cinnamon
1/4 tsp ground nutmeg
1 tbsp plus 1 tsp cornstarch

To make dough
: Place the flour and 3/4 tsp salt in a bowl of a food processor fitted with a metal blade. Pulse to combine. Add 1 cup plus 2 tbsp butter and the vegetable shortening and pulse 6 to 8 times, until it resembles coarse meal. Sprinkle 4 tbsp cold water over hte dough and pulse 3 to 4 more times. Add more water until the dough holds together. Form the dough into 2 disks, wrap each in plastic wrap, and refrigerate for at least 1 hour.

To make the filling
: Combine the apples, lemon juice, sugars, cinnamon and nutmeg and remaining salt in a large bowl and toss. Let sit for at least 30 minutes or up to 3 hours. Brain apples, reserving liquid. Toss apples with cornstarch, and set aside. Place 1/2 cup of the reserved liquid in a small saucepan over medium-high heat, add remaining butter, bring to a boil and let cook until thick and syrupy. Do not stir. Add the syrup to the apples and gently toss to combine.

Bake the pie
: Heat oven to 425F. Roll out one disk into a 12-inch round about 1/8 inch thick, on a lightly floured surface. Fit the dough into a 10-inch pie plate. Trim dough, crimp edge, and fill with the apple filling. Roll out the second disk fo the top crust. Cut out leaf shapes (I cut out heart shapes) and place over the apples, each slightly overlapping the other, to form a top crust. Cut several slits to vent the pie. Bake until the juices bubble through the slits, 45 -55 minutes. Let cool for at least 4 hours before serving.

I couldn't wait four hours, the smell is just so invting and yummy! I served it still hot within one hour from the oven with a side of cold thick vanilla-infused whipped cream!

Wednesday, March 07, 2007

Bread Pudding With Chocolate Chips

After a particularly hectic, stressful week, all I just wanted to do was savor every minute of the weekend either by lounging around, visiting family, and baking a particularly easy dessert. The whole saturday afternoon went by with me just in front of the tv and doing absolutely nothing - a rarity these days and I just wanted to relish every moment of it! But alas, my baking crave still crept on.

A super easy baking is all I wanted and looking at my copy of How To Be A Domestic Goddess, I chanced upon her recipe (and nice pic!) of Pain Au Chocolat Pudding that looks very much inviting and comforting, and would just be perfect for a lazy saturday afternoon. The problem? I didnt have Pain Au Chocolat, and so I modified it a bit using the day-old bread I had on hand and my Callebaut mini-chocolate chips - with good results!

Bread Pudding With Chocolate Chips
Modified from Pain Au Chocolat Pudding Recipe of Nigella Lawson

10 pandesal (local small everyday bread)
About 1/2 cup of mini chocolate chips (or more!)
2 1/4 cups milk
3 1/4 cups heavy cream (I used whipped cream)
3 tbsp sugar
1 large egg
4 large egg yolks
1/2 tsp vanilla extract


Preheat oven to 325F. Butter an ovenproof dish with a capacity of approximately 6 cups. Cut up bread into roughly 1-inch slices and arrange them in the dish, sprinkling it around with chocolate chips.

Meanwhile, put the milk and cream in a pan and bring to near-boiling point. Whisk the eggs, yolks and sugar in a large wide-mouthed measuring cup. When the milk and cream are nearly boiling, pour over the eggs and sugar, whicsking continously. Add vanilla and then pour over the slices of bread and leave to soak for 10 minutes. Transfer to a preheated oven and cook about 45 minutes, or until the pudding is softly set.

You may replace heavy cream and milk with 4 1/2 cups of light cream. At first I was worried as I seemed to have a lot of liquid, but turns out the bread slices have to be generously soaked, the more generous the better! If you plan to halve the mixture into two separate smaller containers like I did, reduce the baking time to 30-35 minutes.

This is seriously good, though I have to admit the chocolate chips contributed so much to the X-factor! Em's abuelita however still makes the best pudding (with raisins) and one of these days, Im gonna head over to her house and see how she makes it and try to comprehend the quantities of the ingredients. Yes, like a true veteran in the kitchen, she doesnt use any measurement and the pudding just comes out as yummy as the last one she baked!

Monday, March 05, 2007

Sweet and Sour Chicken With Carrots


Preparing for Sunday lunch is always a delight, it's the only time I know the whole family is complete thereby making sure EVERYONE is bound to eat what I cook. That way, when you cook up a great meal, you get tons of compliments! What's cooking anyway, if no one is around to savor what you labored so lovingly for?

Browsing through my back issues of Gourmet magazine, I chanced upon this recipe for which I had almost all the ingredients of. It was an issue for Passover, and its full load of recipes that I so want to try. Well, one at a time... and this certainly is a good start. Lemon and honey makes a great combination that I never thought would work with chicken, but this is so delightful. Its the kind of cooking you would pay an arm and a leg for in a restaurant, but turns out it's easy! Cinnamon and paprika provide such aromatic touch and is also a nice surprise, I mean cinnamon for chicken?! I always thought cinnamon is just for dessert!


Sweet-and-Sour Chicken Thighs With Carrots
Freely adapted from Gourmet magazine, April 2005

8 small chicken thighs with skin and bone (2 1/2 - 2 3/4 lb total)
1 1/4 tsp paprika
3/4 tsp cinnamon
1/2 tsp black pepper
1 1/2 tsp olive oil
1 large onion, halved lenghtwise, then cut into 1/4 inch wide strips
1 lb carrots (6 medium), cut diagonally into 1-inch pcs
2 tbsp minced garlic
1/2 cup water
1/4 cup fresh lemon juice
2 tbsp mild honey
1 tbsp finely chopped fresh flat-leaf parsley
1 tbsp finely chopped chopped fresh cilantro

Pat chicken dry. Stir together 1 1/2 tsp salt with paprika, cinnamon and pepper. Rub unto chicken. Heat oil over moderately high heat until hot but not smoking, then brown chicken in batches, turning over once, about 10 minutes per batch. Transfer chicken to a plate.

Discard all but 3 tbsp oil from skillet, then add onions and carrots. Sprinkle with remaining salt and pepper to taste and cook over moderate heat, stirring occasionally, until onion is softened and slightly brown, 8-10 minutes. Add garlic and cook, stirring occasionally, 1 minute.

Return chicken, skin sides up, nesting it into vegetables. Stir together water, lemon and honey until blended and add to skillet, then cook over moderately low heat, covered, until chicken is cooked through and carrots are tender, 25-30 minutes. If necessary, add salt to taste. Sprinkle with herbs just before serving (I didnt have parsley and cilantro, and I substituted the herbs with basil, which worked out just fine).

Thursday, February 15, 2007

Super Strawberry Jam

Jams are not a childhood favorite. I must admit I was more partial and still am to peanut butter, nutella, even chiz whiz. The famed strawberry jams of Baguio, the only place where it can be grown in the Philippines, are much sought after. Even I hoard it even though it takes us months and months to finish it in the house. Although I occasionally indulge in it, I find it a bit too cloyingly sweet.

Not this jam I just made! It is perfect in all aspects. The hue is perfectly red and the taste so not that annoyingly sweet. I hope I can take the credit for creating this perfect jam, but I have Nigella Lawson to thank for it :) Her wondrous book How To Be A Domestic Goddess carries this recipe, and I think the trick really is adding balsamic vinegar to the mixture. It is absolutely true what she said that it sort of brings all the more the strawberry flavor. If you have strawberries in season now, like what we have here, I urge you to please please give this a try.

For three breakfasts in a row, I have been having this with toasted wheat bread and butter. I really have to stop now, as I am trying to lose a few pounds. But I cant help it, Im even scheming to do another batch later to give to friends!

The saucer thing in the freezer (to test on jam doneness) didn't once again work for me. I hope it can be more specific by what it means by wrinkles when pressed. Nevertheless, I am so loving my strawberry jam.

Strawberry Jam
From How To Be A Domestic Goddess

3 - 3 1/2 cups fresh strawberries
2 1/2 cups granulated sugar
2 tbsp fresh lemon juice
1 tsp balsamic vinegar

Put saucer in your freezer. (This is to test for jam doneness) Mix all ingredients in a saucepan, stir with wooden spoon until nicely incorporated. Put to low heat and put to boil stirring constantly. Let boil for 5-8 minutes depending on the size of your pan. Start the saucer test from 4 minutes (take saucer out of the freezer, put a spoonful of jam, let cool a bit and poke at the jam. If it wrinkles, it's done). While testing doneness, take the pan off the heat. When done, let cool for 20 minutes before storing in clean sterilized jars.

Update:
Ive made my second batch, it turned out divine though I liked the first batch better if only for the more fiery red color. The only difference was that this time I used fresh strawberries, unlike the thawed ones before. The color turns out better when the strawberries are frozen then thawed. Sort of makes it more watery, and the color really comes alive.

Tuesday, February 13, 2007

Blueberry Cheesecake


My very first cheesecake! With blueberries to boot. It was wonderful, wonderful, wonderful! And I really cant say that enough. Im quite picky when eating cheesecakes, and I can tell if ingredients were scrimped if it has jelly-like consistensies (substituting cream cheese to gelatine?) For me, its the real deal or none at all, most especially where cheesecakes are concerned.


This recipe is such a keeper, and I really have the ultimate dessert lady to thank for it. She did all the homework so all of us can enjoy and bloat to our friends that we make the best cheesecakes ever! It is incredibly easy to make, and when I say easy - its just mix and pour and bake - literally!

Blueberry Cheesecake
From Lori of dessertcomesfirst.blogspot.com

2 cups graham crumbs
1/4 cup sugar
1/2 cup butter, melted
2 8-oz packages cream cheese
1 can condensed milk
3 eggs
2 tsps lemon juice or juice of two calamansi (local small lemons)
For the sauce:
8 ounces blueberries
1/2 cup sugar
Juice of 1 lemon

Preheat oven 300 degrees. Combine crumbs, butter and sugar. Press firmly on bottom of 9-inch springform pan. Bake for 10 minutes. Set aside.

With mixer, beat cream cheese in largr bowl until fluffy. Gradually beat in condensed milk until smooth. Add eggs and lemon juice. Mix well. Pour into prepared pan, even if still warm. Bake for 50-55 minutes or until center is slightly jiggly but perimeter is set. Cool 1 hour. Chill at least 4 hours to let flavors develop. Ms. Lori said this will keep for two weeks, but it lasted only two days with us, its just too yummy :)

To make the blueberry sauce, combine together in a saucepan until just boiling and the juices are oozing. Adjust sugar according to taste, then put to slow boil again. Top in cheesecake after cooling.

Wednesday, February 07, 2007

Blueberry Muffins


With the blueberries waiting to be used in the ref, I excitedly put out my copy of the sexy Nigella Lawson's How To Be A Domestic Goddess and chose between making a trifle or a muffin. The muffin won over as I lacked some of the ingredients of the trifle. These were great, and a good start for this Nigella-wannabe. As my copy is fairly new, this is the very first recipe from the book that I have tried.

The locally-grown blueberries did not disappoint, and provided just a tad tartiness to the muffin. The Little Bee tried it, and was amused that we were putting fruits in our baked goods. She prefers chocolate chips though.

Blueberry Muffins
Freely adapted from How To Be A Domestic Goddess

1 1/3 cup all purpose flour
1/2 tsp baking soda
2 tsp baking powder
1/4 cup sugar
pinch of salt
6 tbsp butter
3/4 cup + 2tbsp buttermilk (or 1/2 cup yoghurt + 1/4 cup milk)
1 large egg
7 ounces blueberries

Melt butter. Preheat oven to 400 degrees. Mix together all the dry ingredients. In a separate bowl, beat gently egg, buttermilk and butter. With a light hand using a wooden spoon, pour over wet ingredients to the dry ingredients and mix gently. Do not overwork, lumps are ok. Fold in blueberries gently. Pour half-full into muffin papers. Bake for 20 minutes and cool.

Fresh bake aroma was wafting in the house the whole time these little muffins are baking in the oven. Oh, how I wish I could have all the time in the world to bake, if only for the warm fuzzy feeling that certain aroma brings, especially on a particularly cool February night!

Monday, February 05, 2007

Blueberries


The weather has been pretty balmy the past two weeks, it has been very pleasant outdoors at about 20 degrees temp instead of our usual 32. Nights are so comfy and we always find it hard to wake up in the morning as our pillows are so irresistibly huggable! Strawberries from up north are finding its way to the markets, but I was still amazed to see blueberries on sale! This is really the first time I've seen locally grown blueberries and while it is pitifully small than the Western counterparts, I still got excited! So many recipes to finally try! The vendor said it can last a week in the ref, and in the meantime Im thinking of ways to put it to good use. With a busy sked ahead, I sure hope I can sneak in some time to sit down and properly pay these little rare berries some respect. Blueberry muffins? Blueberry cheesecake perhaps? Or blueberry jam?

Thursday, February 01, 2007

A Sight To Behold


I did not just conquer a mountain, I saw the SIGHTS... It was the most amazing experience especially when shared with a loved one. The hurdles were plenty and the sacrifices abound, but the sights and the experience were unforgettable. Hey, I am now a mountaineer :)

Flourless Peanut Butter Cookies

In an attempt to produce more baked goods over the holidays for gifts, I reached for the first interesting recipe I saw which seemed easy and quite different. The tiny little word 'flourless' appealed to me in this recipe as well as the fact that peanut butter remains to be a favorite. I should tell you though, that (horrors!) I was not in my best of moods when I baked these, you know those few days before Christmas when everything is in a rush and you oftentimes wish that Christmas is still a month away? That was my kind of day, and if you live in this part of the planet - you will know and you will understand that the HUGE stress-inducing holiday problem is almost always the traffic all around the city.

So I started to bake very late, and the next day was the last day of work before Xmas and I had to, I just had to give out already the goodies. And so it was too late to realize that being flourless, the cookies did not keep well in their containers and kept on crumbling! They are fantastic nonetheless, but is best eaten and served right in your own home as it really does not travel well.

Flourless Peanut Butter & Choc Chip Cookies
From Bon Appetit Sept 1999

250 g chunky peanut butter
200 g golden brown sugar
1 large egg
1 tsp baking soda
1/2 tsp vanilla extract
160 g miniature semi-sweet chocolate chips

Preheat oven to 180C. Mix all ingredients except choc chips in medium bowl. Mix well then add the choc chips. Using moistened hands, form generous 1 tbsp dough for each cookie into ball. Arrange on 2 ungreased baking sheets, spacing 5cm apart. Bake cookies until puffed, golden on bottom but still soft to touch in the center, about 12 minutes. Cool on sheets for 5 minutes. Transfer to racks and cool completely.

Friday, January 19, 2007

Bittersweet Chocolate Tarts


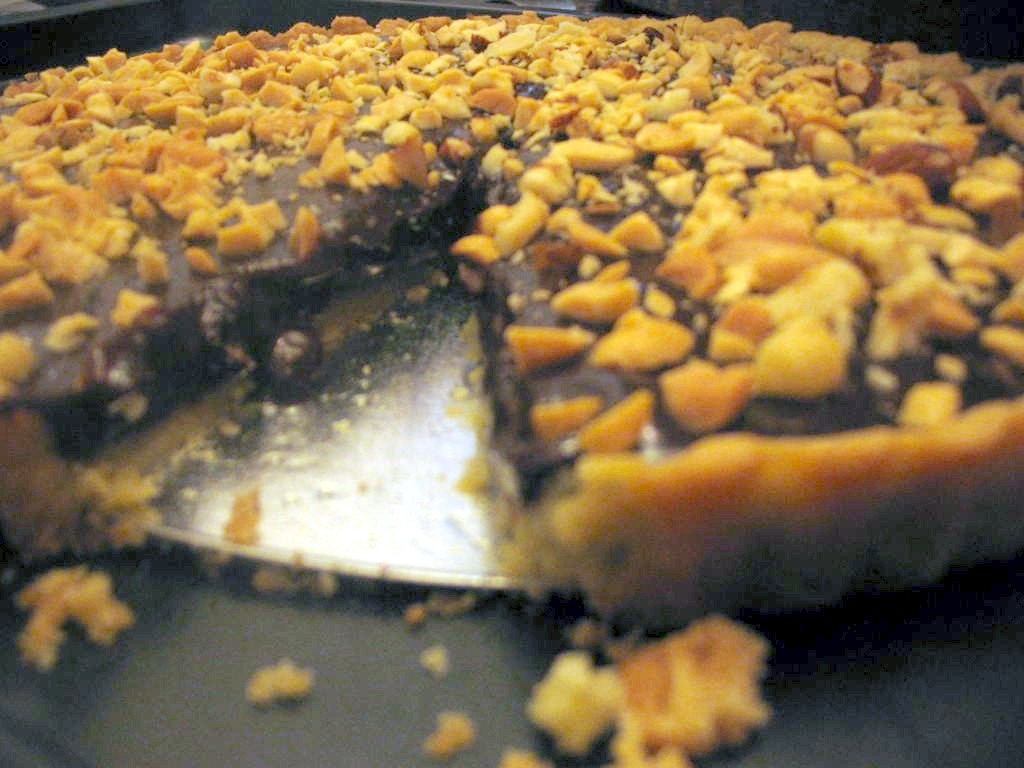
I have made this chocolate tart once with much success, and was determined to let my whole brood taste it. So I thought, what better occasion than our Christmas dinner? The key here is a good quality chocolate, because really for this particular one - the chocolate rules! The crust is however also a delight and provides a nice complement. And even though there are no nuts in the crust, it has a certain nutty bite to it - where does it come from?! In any case, everyone except my dad was bowled over by the tart - he said it's not cake (which really Pa, its not) - but just melted chocolate! Horrors, but it really is not the flaw of the recipe but my complete disregard of proper measurement on the second one I baked ( which happened to find its way to my dad). I knew it, I placed too much chocolate just so I never have to store a small piece as I knew it wont be enough for whatever baked goods I would be thinking of next. Anyways, here's the recipe:

Bittersweet Chocolate Tartlets
freely adapted from Alice Medrich's Bittersweet

For the crust:
8 tbsp butter (1 stock), melted
1/4 cup sugar
3/4 tsp vanilla extract
1/8 tsp salt
1 cup all-purpose flour

For the filling:
1 cup cream (I used all-purpose cream)
2 tbsp sugar
8 ounces bittersweet chocolate (I used Callebaut 60%), chopped
1 large egg

Preheat the oven 350 degrees. In a bowl. combine butter, sugar, vanilla, salt and flour. Mix until just blended. The dough should be very soft and moist.

Gently press the dough into the tart pan. The recipe calls for 8 4-inch wide by 3/4 deep fluted tartlet pans. I used an 8-inch wide tart pan. Press in the dough as thinly as possible.

Place the pans in the oven and bake for 15-20 minutes until the crust is golden brown.

Meanwhile, heat the cream and sugar in a small saucepan to boiling. Pour over the chopped chocolate and whisk together until combined. Whisk the egg into the mixture just before taking the shells out of the oven.

Remove shells from the oven and turn off heat. Pour the filling into the shells. Return the tart to the oven and leave them there for abour 5-10 minutes, or until the filling is just beginning to set about the edges.
Because I messed up with the measurements of the filling, mine did not set quickly. I had to turn the oven on again to 350, and it took about 20 minutes to set.

Place the tart on a wire rack to cool. Just before serving, sprinkle with your choice of toppings. The first one I made I served plain, and the Christmas tart I sprinkled with chopped mixed nuts. Other than nuts, Ms. Medrich suggests cocoa nibs, dried cherries, anise seeds and chili powder.

Thursday, January 18, 2007

Can I Really Finally Get Through?

The Taiwan earthquake has left me with a whole lot of entries from Christmas and New Year. Can I really now blog after the Dec26 quake disrupted my internet connection? Sigh, its been a frustrating ride, and Im sure glad its now back (crossing fingers ;) It has also been a busy January so far, with start-of-year engagements at work and a mountain conquered. Yes, a huge, huge mountain. ;)

Friday, December 15, 2006

Peanut Butter-Chocolate Chunk Cookies

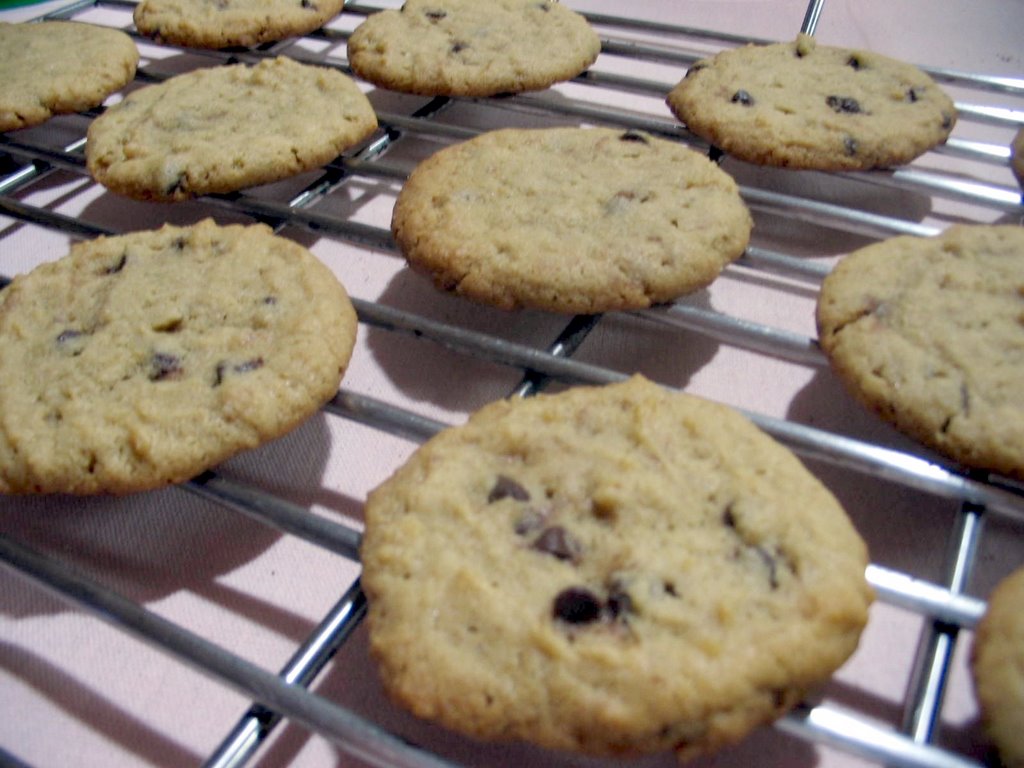
Christmas is just around the corner, and I feel like its passing me by. The past weeks have been so frantic that I didnt realize I was behind with my gift-shopping until its already the Little Bee's start of Chistmas break. I suddenly bolted to reality when I still didnt have gifts for her teachers. And since I vowed to give homemade food-gifts this year, I set out to do the task ahead. So last night, I slept so late making these cookies to make it in time for the Bee's morning class. These cookies are chewy, though a bit greasy for me. I will ease up on butter the next time around. I would have wanted the peanut butter to be a bit more pronounced. But overall, I'm happy with the results - its chewy and crunchy at the same time and I can imagine it's best paired with warm milk just before tucking in for the night. There's something about these cookies that just evokes warmth - could it be the Yuletide season?
Peanut-Butter Chocolate-Chunk Cookies
Freely adapted from MarthaStewart.com
1/2 cup unsalted butter, room temperature
3/4 cup creamy peanut butter
1/2 cup granulated sugar
1/2 cup tightly packed brown sugar
1 large egg
1/2 tsp pure vanilla extract
1 cup all-purpose flour
3/4 tsp baking soda
6 ounces semisweet chocolate chunks, coarsely chopped (I used Callebaut mini dark chips)

Heat the oven to 350F. In an electric mixer, cream butter, peanut butter, and sugars until light and fluffy. Add egg and vanilla, and mix on medium speed until well-combined. Sift flour and baking soda together, then add to the butter mixture, beatinf just to combine. Fold in chocolate chunks.

Using a spoon, scoop out 1 1/2 ounces of the cookie dough to an ungreased baking sheet. Press down slightly to flatten. Bake until golden brown, 18-20 minutes.

Transfer to a wire rack and cool completely. Can be stored in an airtight container up to two weeks.

The first batch I made was so lousy coz I placed a big scoopful and didnt leave enough spaces between each cookie. This certain cookie dough can spread too widely in the sheet, so be careful with the spacing. Also, I found that waiting 18-20 minutes resulted in a burned bottom, so I suggest taking it out at 15 minutes instead. The original recipe says it makes 14 cookies, but on double-recipe I easily whipped out some 50 pieces.

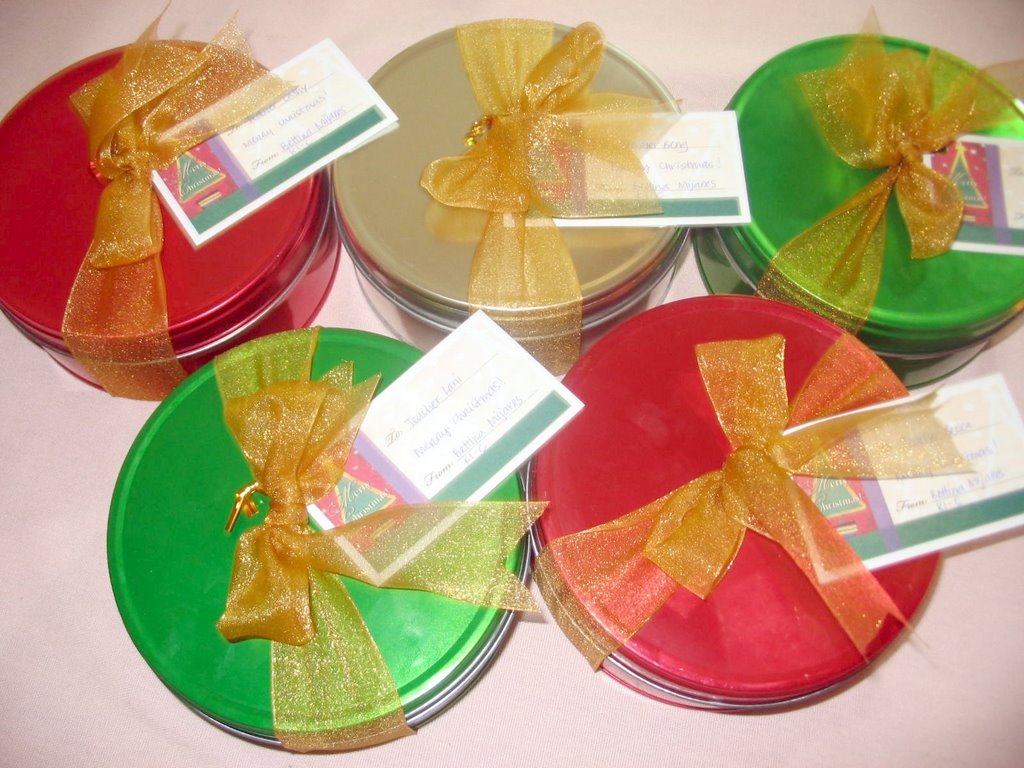
I found some tin cans in Christmas colors, which came in handy for the packaging. I sure hope the teachers were happy with it :)

Wednesday, December 13, 2006

Royce' Chocolates!


Royce Chocolates!!! I can't contain my excitement when this was sent to me by an uber-thoughful couple who are also my clients. It's the first time Im tasting this much-talked about confection, which is considered the Rolls-Royce of chocolates. Japan is actually not only known for their high-tech inventions, but for their chocolates as well - and Royce' is considered to be the best.

It came in small squares wrapped individually, apparently to keep the chocs from sticking together as they are very sensitive to heat and melts easily. I grabbed one, and immediately was captured by a cocoa aroma so strong it feels like the purest of chocolates. The texture factor was the best, it simply just melts in the mouth in the most delightful way. And the taste lingers long after you've finished a piece.

The fact that it's not available in Manila makes this all the more appealing. I know of people hoarding this whenever they go to Singapore or Hongkong, although I didn't and frankly it's only because I didn't know any better back then. On my next trip, I will definitely be one of the hoarders. Now, if only someone will gift me with their chocolate-covered potato chips, my Christmas will be super! *wink wink*

Tuesday, December 12, 2006

Guyabano (Soursop) Jam


Guyabano is also known as soursop or guanabana. It is a delish fruit that grows only in the tropics. Its green leathery spiky skin belies the white fleshy pulp that lies within, at once sour and sweet. Having seen a Mangosteen Jam available in the market, I thought a guyabano might make a wonderful jam too - knowing that its is fleshier than mangosteen.
I was wandering through the market early Saturday when I spied this and immediately thought of making jam. I had to wait 3 days though before I felt that its ripeness is ready. When I opened, i found it was too sweet with not enough tartness a jam should have. Luckily, I had some lemons which came in handy.

Guyabano Jam
About 3 cups guyabano
2 cups white sugar
Juice of 1 lemon

Remove flesh pulp from the skin and place in a big pot. Add sugar and lemon and mix well. Put to a boil, and then to a rolling simmer for about 30 minutes. I actually did the saucer trick from the Domestic Goddess book of Ms. Nigella Lawson, which is to put a sacuer in the freezer before you start - then check for jam doneness by putting a little in the cold saucer. Ms. Lawson said if it wrinkles, then its done. Didnt work for me though, I was too impatient I think to wait for it to be done. In the end, I had a jam that looked so pale but tasted great nonetheless. With butter and toasted bread, my breakfast this morning was simply delicious!

Monday, December 11, 2006

Plum Crumble

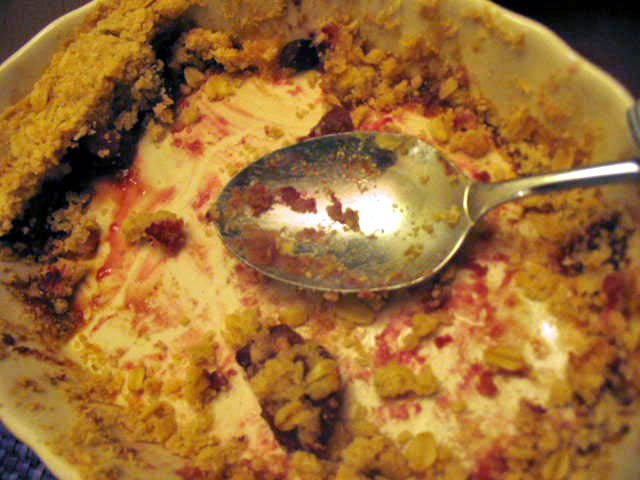
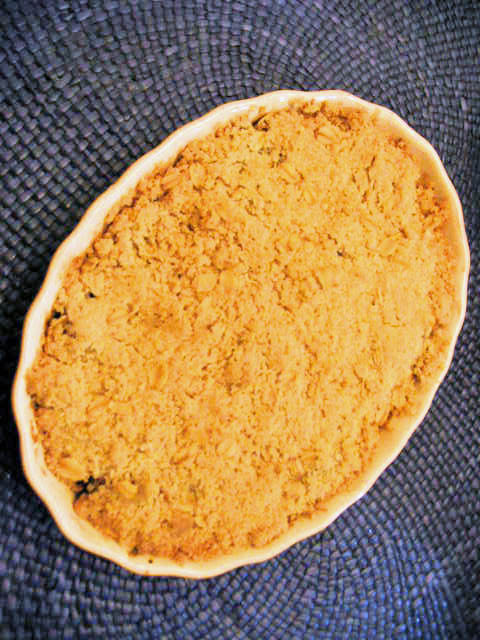
Plum crumble is one of the favorite things I like to bake. The gurgling redness of the baked plums is so irresistibly attractive and yumm. I also trick myself into thinking it is a healthy dessert, being fruit based and baked. Add to that it is so incredibly easy to make, with very little washing to do after. I brought this to a potluck Christmas party with friends I have known all my life. Being friends that long means I can never get away with criticisms with my cooking/baking, no matter how constructive they are. But this particular one, they like it to bits! One comment was that it is not cloyingly sweet, and has some tartness to it that's just so appealing. Another friend has been asking the whole night what went into the crumble.

Although we didnt have some that night, this is best eaten with vanilla ice cream and still fresh out of the oven. Whipped cream would be great too, though I can imagine the calories would be too noticeable to ignore. I also finally was able to use my baking dishes as shown, which I got for a song at the outlet store.

Plum Crumble
From Marketmanila, adapted from Martha Stewart
1 kilo plums
Half a lemon
1/2 cup white sugar
2 tbs cornstarch
butter, for greasing
2 1/2 cups all purpose flour
3/4 cup brown sugar
1/3 cup white sugar
1/2 tsp ground cinnamon
1/2 tsp salt
1 1/4 cups cold butter, cut into small squares
1/2 cup old fashioned oats (I used rolled oats)

Cut plums into eighths and place in your greased oven-proof bowl, pitted but with skins on. Spritz with lemon and add 1/2 cup of white sugar and the cornstarch. Toss gently.

To make the crumble, mix together flour, 2 sugars, cinnamon and salt. Mash the mixture with the cold butter until it resembles an uneven crumble. Do not overwork the butter or it will melt. Mix in the oats.
Sprinkle the crumble over the plums unevenly. Make sure to put it evenly or a little bit heavier on the sides as it might sink in the middle. Bake at 375F until the juices are gurgling and the crumble is golden brown. Mine took about 40 minutes.

I will try this with another fruit next time, perhaps some peaches as Marketman suggests, or pears. The crumble is a winner by itself, so any fruit you fancy I'm sure will work well with this recipe. Definitely a keeper :-)